Identification and Function of Equipment
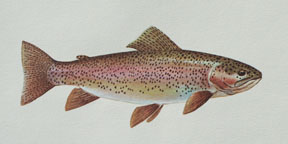
Rainbow Trout
Selecting a Rod for a Beginner
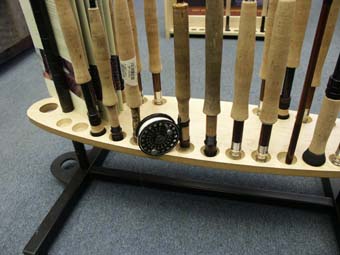
Fly fishing rods start with the reel seat where the reel is attached, usually by a threaded ring. The next section is the handle which is traditionally made of cork. If you are looking at a fiberglass fly rod with a foam handle in a discount store, please don't purchase it as you are, more than likely, purchasing a bargain of troubles. They are extremely difficult to cast even for experienced casters. After the handle the base section of the rod will include the manufacturer's recommendation for the proper line weight as well as noting the length of the rod. You should also find a ring keeper to attach your fly while you are walking.
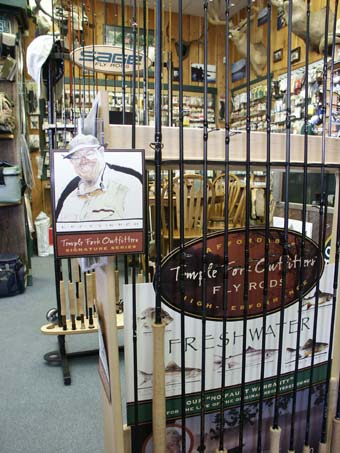
The best fly rod for a young beginner would be a graphite rod purchased in a fly shop for under $200. I recommend Lefty Kreh’s Temple Fork Outfitters fly rods. (http://templeforkflyrods.com/index.html.) The most commonly recommended fly rod would be an eight foot rod for a number five or six weighted line; however, I started my sons out on an 8' rod for a 4 weight line. It is lighter and will not wear out a young boy or girl. One disadvantage of a light weight rod is that it is difficult to cast in the wind. Avoid purchasing a combination spin and fly rod as they merely compromise the best qualities of each design. Fly shops encourage customers to cast a number of different rods, as some rods have a faster tip action. It is strictly a matter of preference.

Selecting a Reel
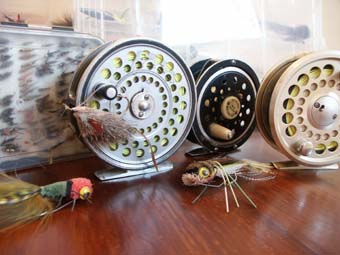
A single action reel will serve you best. This reel will have a detachable spool and a drag adjustment. The drag adjustment is used once you have caught a fish and all of your loose line has been reeled up on the spool. If the fish is an especially strong or large fish, he will want to run. When he does this, he will pull line off of the spool. If your drag is set too light, the fish will run too far and you may over play the fish. Although the newer reels have some sophisticated drag systems, the tried and true design is the common click-pawl system, which uses a triangular piece of metal (pawl) that clicks on the rotating teeth of a gear.
Do not over play a fish that you wish to release, as long after you have congratulated yourself on releasing the fish, the stress may later lead to death. If the drag adjustment is set too tight, the pulling fish may break the tippet leaving you with "the one that got away story," especially if you are fishing on Crowley Lake or Bridgeport Reservoir.
Selecting a Fly Line
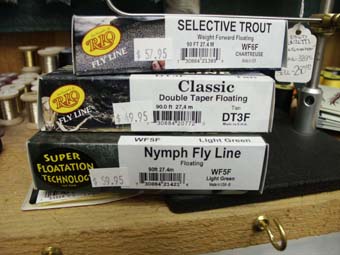
The weight of each fly line is based on the weight, measured in grams, of the first thirty feet of line. Somewhere at the base of every fly rod will be a recommendation for an AFTMA fly line (American Fishing Tackle Manufacturers Association). All fly lines are rated for taper, weight and function. Keep in mind that, in most cases, a rod may use a fly line one number heavier than recommended, although rarely can you use one line under that which the manufacturer recommends and still cast with ease.
Weights range from 1 to 12 with 5 and 6 being the most popular. Line numbers 1-4 are extremely limited in that they are designed for relatively short casting on calm, flat water with no real wind, and they are accompanied by long leaders and tiny flies for delicate casting. Line numbers 5-7 are the most versatile as they may be cast in moderate wind, and yet they still maintain delicate landings for small flies. The advantage of these weights is that they are also designed, in conjunction with the rod, to handle heavier fish in fast water. Practically speaking, there are no disadvantages for these weighted lines for the majority of fishing conditions with the exception of salt water fishing. If you are going to be limited to one rod, purchase a 6 weight.
Line numbers 8-9 are heavy lines for big water and forceful wind conditions. The advantage of these lines is that you may fish deep with large, weighted flies and make long casts. Line numbers 10 - 12 are designed for salt water conditions.
The next designation on the fly line package is an abbreviation for FUNCTION. You have a choice of floating, sinking and floating with a sink tip. The floating line is by far the most versatile. If you need to sink a fly, put on a piece of lead. How much should you spend for a line? If you want to save money, buy a cheap reel. If you want to limit your casting distance and watch your fly sink when it obviously should not, buy a cheap line. Stay with Cortland, Scientific Angler and Rio, and you won't go wrong. Fly lines deteriorate when they become dirty. They wear out from unnecessary abrasion. Periodically, clean your fly line in mild detergent, dry it off, and then take it out in the sun and gently stretch the coils out of the line. Warning: sun screen may block out the harmful rays of the sun, but it also melts fly lines!
Regarding color, Cortland Line Company in their publication, Fly Rod Fishing Made Easy, recommends a highly visible line for the fisher as it, naturally, is easier to locate your fly and control your line. Fluorescent lines do not spook fish -- poor casting does that! Cortland reasons that, "Looking upward, fish see objects against the light sky -- and it seems to us that a light colored line would actually be less visible than a darker one."
I highly recommend felt sole wading boots. Waders are a necessity unless you have a tolerance for cold water. I do not recommend cleats as they create underwater noise that spooks fish.
